

Your Android machine depends on its screen, and when this screen stops functioning, so will everything else. In case you notice flickering or brightness issues, quick action helps prevent them. Many screen glitches can be fixed easily at home without expert help. So, this guide covers simple ways, including an Android repair tool, to restore screen performance.
Part 1. Key Signs Your Android Device Has Screen or Display Problems
Noticing screen problems early helps prevent bigger issues with your Android device. Here are key signs to recognize early so you can fix Android system problems:
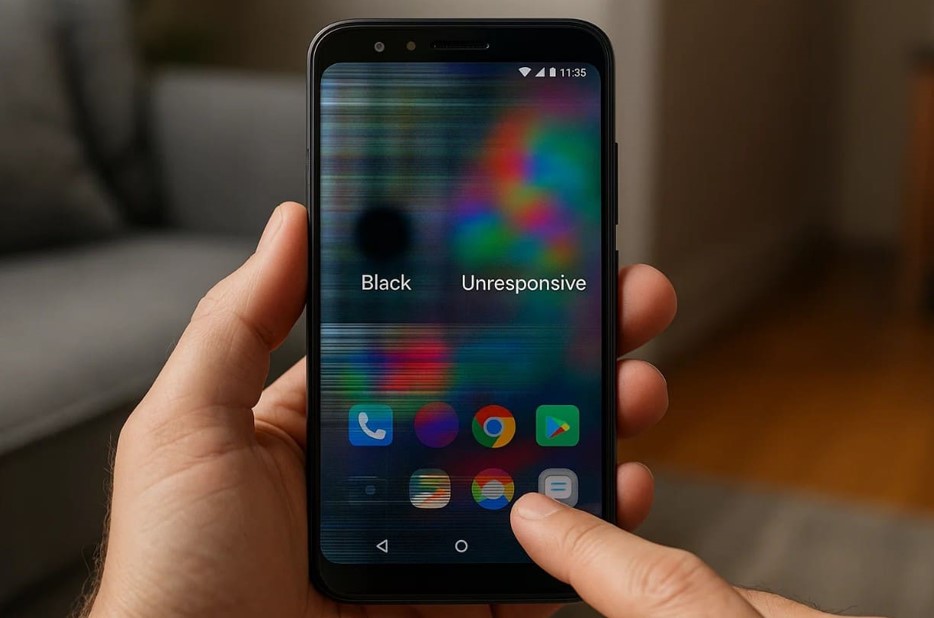
- Screen Flicker: The display flickers to make visuals unstable and hard to read. This shows damaged hardware or software issues that need immediate system attention.
- Black Spots: Dark patches appear on your display even when it is turned on. It indicates screen damage or internal display circuit issues needing repair.
- Color Distortion: Colors appear strange or inconsistent across different apps and screens. Such a distortion shows system errors that need repair to fix the Android system.
- Unresponsive Touch: Touch inputs fail or respond slowly when you tap icons or type messages. This can also indicate screen or system issues that require quick attention and fixes.
- Random Lines: You see horizontal or vertical lines running across your Android screen. These lines usually suggest a GPU malfunction or loose display cable connections.
Part 2. Proven Ways to Repair Android Screen and Display Issues
After identifying the possible screen issues, following proven methods ensures you can resolve the issue:
Fix 1. Restart Your Android Device to Fix Temporary Screen Glitches
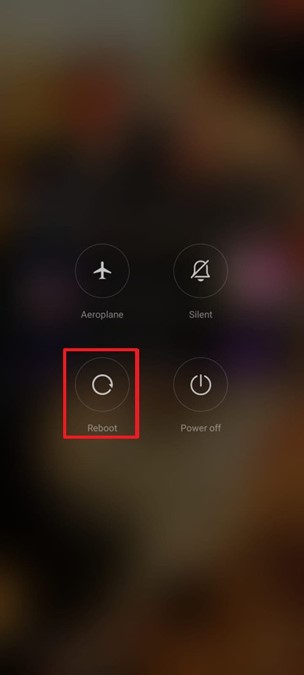
Restart is the first and simplest way to refresh the system quickly. It clears temporary glitches that cause screen flickers or even display freezing. This method requires no technical skills and resolves minor software conflicts automatically. Thus, go through the given steps to restart your device effortlessly:
Instruction. When you press and hold the “Power” keys, opt for “Reboot” to restart your device.
Fix 2. Clear Cache & Unnecessary Files Affecting Display Performance
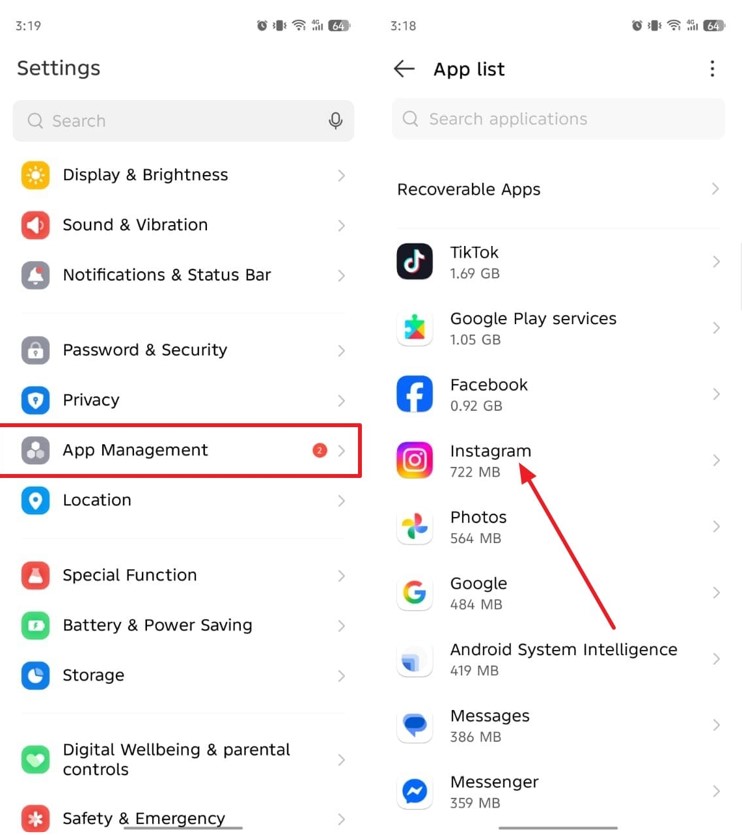
This method also helps improve your phone’s display performance quickly. In case you see display problems after opening a specific app, you should clear the cache immediately. It removes outdated data, causing slow visuals or flickering issues on your screen. Review the following guide to fix Android system display issues:
Step 1. Go to the “App Management” section to access the “App List” and select the app where you notice display problems.
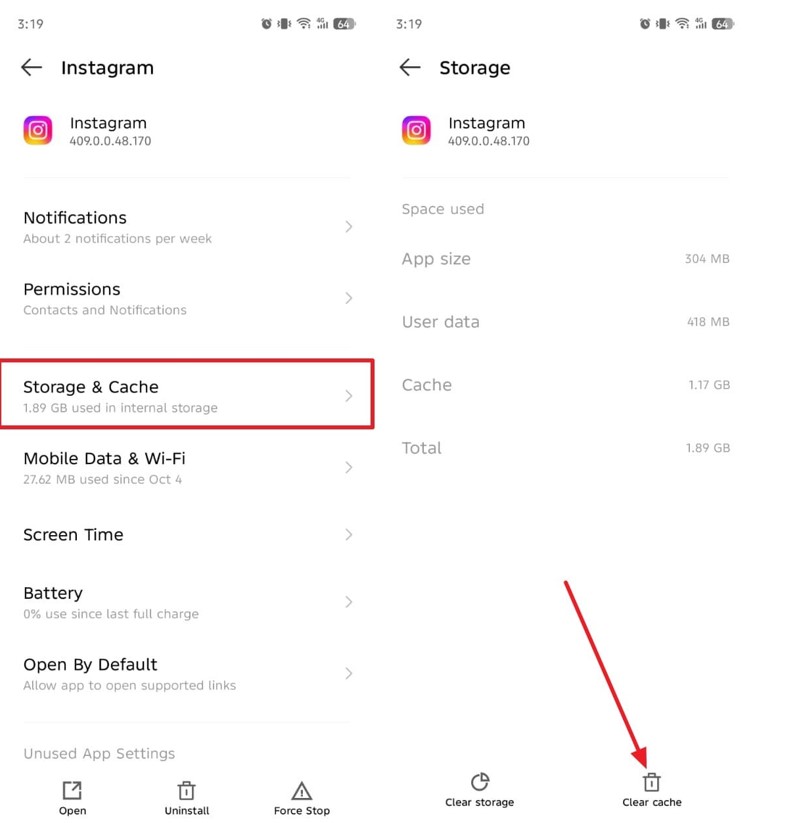
Step 2. Afterward, navigate to the “Storage & Cache” and opt for the “Clear Cache” option.
Fix 3. Use Android Repair Tool to Restore System and Screen Functionality
When standard methods fail to fix display glitches, professional help becomes essential. Here, Dr.Fone – System Repair (Android), an advanced Android repair tool, offers a system recovery solution. This tool repairs freezes and crashes that happen after faulty or incomplete software updates. Besides, it ensures device safety by repairing corrupt firmware files that cause black or blank screens.
Plus, Dr.Fone recognizes the correct firmware version based on the device’s model. It even supports almost all famous smartphone brands, such as Xiaomi, POCO, and Samsung. Yet, data removal may occur for Samsung devices, so it is strongly recommended to backup Android phone to PC using Dr.Fone Basic. The tool also maintains complete system performance and prevents overheating or lag after repair.
Guide to Use Dr.Fone – System Repair (Android) and Resolve Display Problems
Take guidance from the following step-by-step tutorial to fix Android display issues using this tool:
Step 1. Open the Android System Repair Tool
Initially, select “System Repair” from the “Toolbox” tab and choose “Android” as your device. Connect your phone to the PC and click the “Repair Now” button under “Android Repair.”

Step 2. Enter Your Android Device Information
Choose your device brand from the available options and press “Start.” Enter your phone’s details and put your device into “Download Mode” after pressing “Next.” The tool will then download the latest compatible firmware for your device.

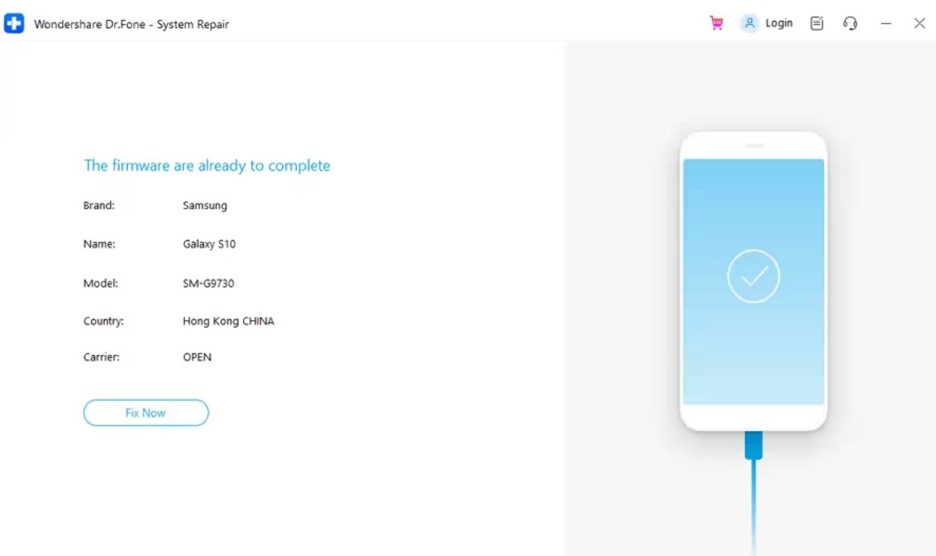
Step 3. Resolve the Display Issues on Your Device
Going ahead, hit “Fix Now” and then enter “000000” in the dialogue box. Here, press “Continue” to authorize the repair, and Dr.Fone will then initiate fixing your device’s problems.
Use Cases of Dr.Fone – System Repair (Android)
Below are common use cases where this reliable tool restores smooth device performance:
- Phone Drop: Phone screen stops responding after a slight drop without visible cracks. System repair fixes internal software damage affecting touch and display behavior.
- Black Display: After charging overnight, your device turns on but only shows a black screen. Dr.Fone repairs the interrupted boot process and brings back the standard interface.
- App Lag: Many users notice their apps keep crashing or freezing during usage. This tool fixes internal software glitches behind slow app launches and random crashes.
- Stuck Logo: Your phone remains stuck on the brand logo during startup after a forced shutdown. Dr.Fone reinstalls the official firmware, fixing errors created by incomplete system initialization.
- Random Reboot: The phone restarts several times a day without pressing any buttons. This repair tool removes system conflicts that trigger random reboots.
Fix 4. Update Android OS and Display Drivers to the Latest Version
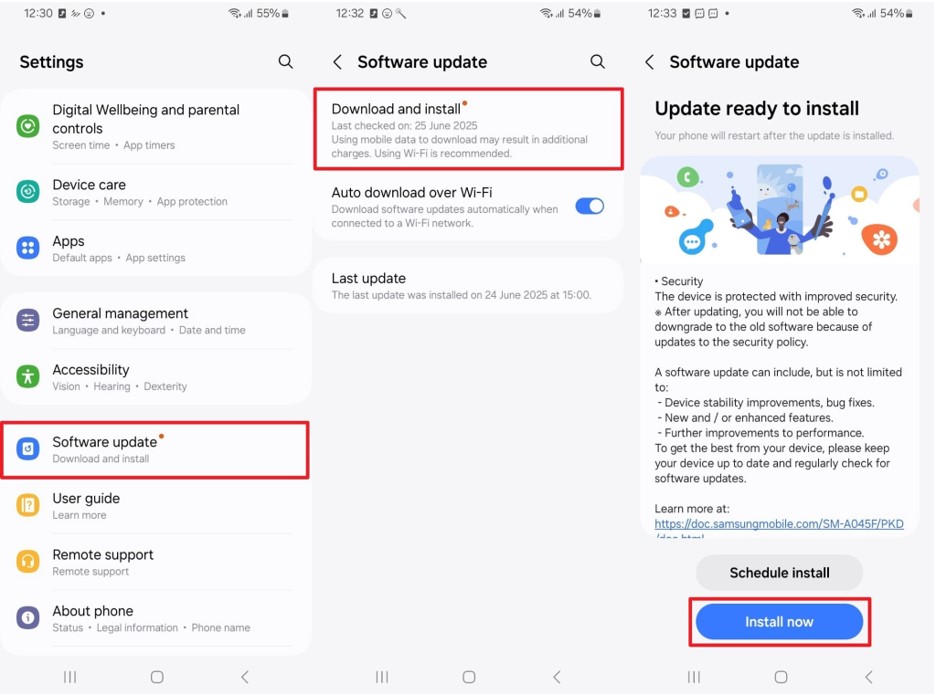
Screen issues also occur when Android OS or display drivers are outdated, causing flickers or freezes. Therefore, it is recommended to update your device’s software. Update fixes bugs and firmware patches that ensure smoother display operation. Let’s explore the steps below to update your Android OS without hassle:
Instructions. Upon navigating to the “Software Updates” section, tap “Download and Install” and press “Install Now.”
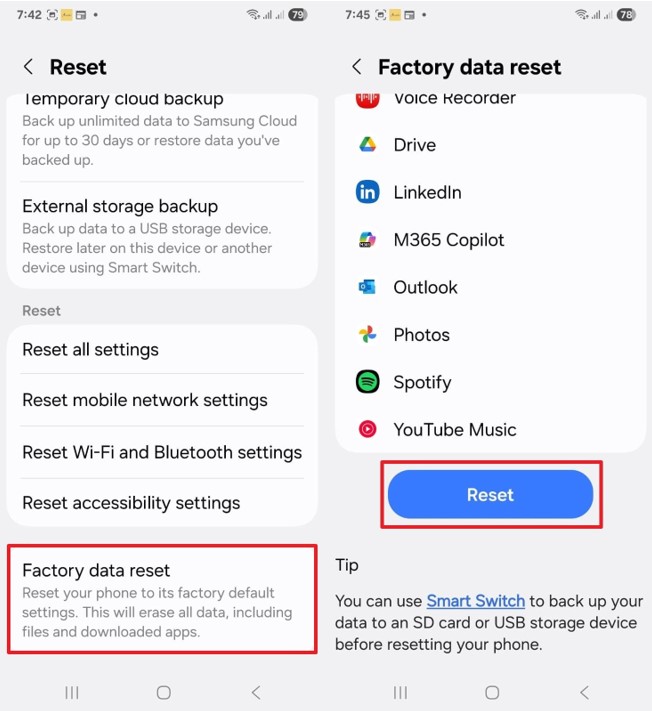
Fix 5. Perform a Factory Reset to Resolve Persistent Screen Issues
A factory reset helps remove deep software problems that standard methods fail to fix. It restores your phone to its original state, clearing hidden bugs and system errors. Before resetting, always back up your Android phone to a PC to protect personal files and photos. Anyhow, adhere to the given instructions to factory reset your device:
Step 1. As you go to the “General Management” section, access the “Reset” option.
Step 2. Afterward, navigate to the “Factory Data Reset” section and press “Reset.”
Conclusion
To sum up, Android screen problems can interrupt daily tasks, but timely action helps avoid severe damage. From clearing cache to updating software, simple actions can bring instant improvements. However, if display issues continue or your device becomes unresponsive, you need a stronger solution. In such cases, an Android repair tool like Dr.Fone – System Repair (Android) is recommended.